For my home office I was looking to upgrade my network, which ended up being quite an adventure, since the NICs I chose didn’t work out of the box.
I wanted to get some experience with setting up fiber ethernet links and also to get more performance out of my NAS. This way I can directly edit RAW photos on my SMB share without getting too annoyed about loading times.
While researching my options I stumbled upon a company that was selling 10GbE PCIe adapters for only 19 EUR per adapter. This shows that it should be possible to create a relatively affordable setup connecting three machines together.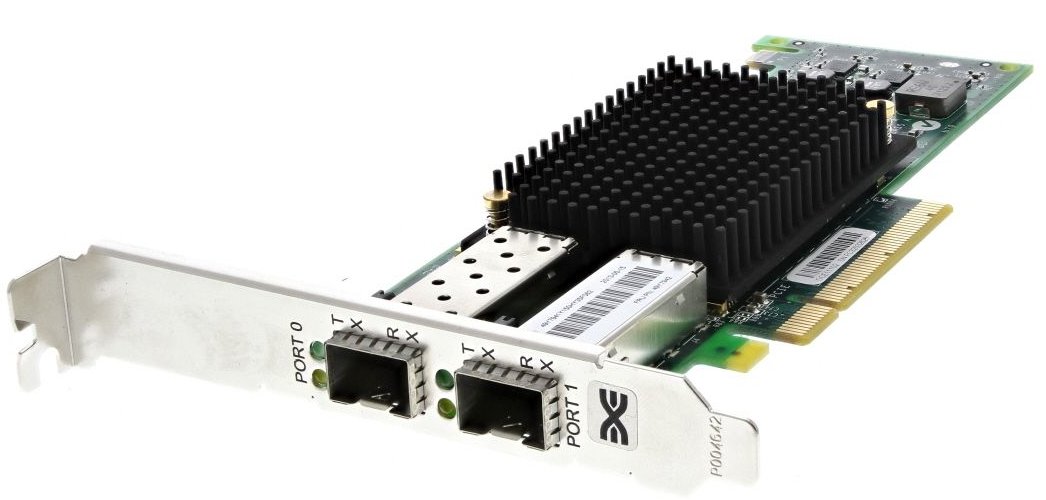 Emulex OneConnect OCe11102 NIC
The next step was choosing a suitable switch for this setup. The video ‘Affordable In-Home 10 GbE Networking’ convinced me to go with the MikroTik CRS305-1G-4S+IN switch.
The idea is to use three of the four SFP+ ports for the systems (including my NAS) I want to connect and use the gigabit port for uplink to an existing switch.
List of components used
| IBM Emulex VFA5 2x 10GbE SFP+ PCIe (Emulex OneConnect OCe11102) | 3 | 19 EUR per adapter (used) |
| MikroTik CRS305-1G-4S+IN | 1 | 139 EUR |
| LC UPC to LC UPC Duplex OM3 Multimode Fiber Optic patch cables | 3 | 5-9 EUR depending on length |
| UF-MM-10G Compatible 10GBASE-SR SFP+ transceiver 850nm | 6 | 16 EUR per SFP+ module |
| Total | | ~ 310 EUR |
I went with Ubiquiti compatible SFP+ adapters (from FS.com) since I already have some Ubiquity gear and read that these adapters are compatible with the chosen MicroTik switch.
Getting the Emulex adapters to work
After installing the card in my machine two network interfaces appeared:
be2net 0000:01:00.0: PCIe error reporting enabled
be2net 0000:01:00.0: adapter not in advanced mode
be2net 0000:01:00.0: FW config: function_mode=0x6003, function_caps=0xf
be2net 0000:01:00.0: Max: txqs 16, rxqs 5, rss 4, eqs 8, vfs 16
be2net 0000:01:00.0: Max: uc-macs 30, mc-macs 64, vlans 64
be2net 0000:01:00.0: enabled 4 MSI-x vector(s) for NIC
be2net 0000:01:00.0: created 4 TX queue(s)
be2net 0000:01:00.0: created 5 RX queue(s)
be2net 0000:01:00.0: FW version is 4.2.324.30
be2net 0000:01:00.0: HW Flow control - TX:1 RX:1
be2net 0000:01:00.0: Emulex OneConnect(be3): PF  port 0
be2net 0000:01:00.1: PCIe error reporting enabled
be2net 0000:01:00.1: adapter not in advanced mode
be2net 0000:01:00.1: FW config: function_mode=0x6003, function_caps=0xf
be2net 0000:01:00.1: Max: txqs 16, rxqs 5, rss 4, eqs 8, vfs 16
be2net 0000:01:00.1: Max: uc-macs 30, mc-macs 64, vlans 64
be2net 0000:01:00.1: enabled 4 MSI-x vector(s) for NIC
be2net 0000:01:00.1: created 4 TX queue(s)
be2net 0000:01:00.1: created 5 RX queue(s)
be2net 0000:01:00.1: FW version is 4.2.324.30
be2net 0000:01:00.1: HW Flow control - TX:1 RX:1
be2net 0000:01:00.1: Emulex OneConnect(be3): PF  port 1
be2net 0000:01:00.1 enp1s0f1: renamed from eth1
be2net 0000:01:00.0 enp1s0f0: renamed from eth0
be2net 0000:01:00.0 enp1s0f0: Link is Down
be2net 0000:01:00.1 enp1s0f1: Link is Down
As you can see the link on both ports is still down. Before investigating this any further, let’s first make sure the firmware is up to date.
Making sure the firmware is up to date
Finding the correct firmware files can be challenging as there are multiple manufactures for these adapters and they aren’t meant for the consumer market.
Luckily I found an .iso file on the HP Enterprise Support website with firmware for a more recent (OCe14000) card that also contained a firmware image for the cards (OCe11000) released May 13th 2020.
OneConnect-Flash-12.0.1280.5-x64.iso
(sha256: 26037fe8eb5bf0bcfa7cdd9e4587f2412b1dbaed51efbd271bb8833c92aaf96c)
You could probably use the .iso image directly to flash the adapter, but I did use ethtool -f to flash the image contained within the .iso image instead (since you don’t have to write the .iso file to a USB or CD).
Move the UFI/oc11-12.0.1280.0.ufi file to /lib/firmware and flash it using ethtool:
# cp /media/iso_mount/UFI/oc11-12.0.1280.0.ufi /lib/firmware
# ethtool -f enp1s0f0 oc11-12.0.1280.0.ufi
and reboot afterwards.
NOTE: If your current firmware version is lower then 10.0.803.37 you have to flash the adapter twice according to Broadcom’s documentation:
You must perform the firmware update procedure twice to ensure that the flash regions are properly configured, and you must reboot the system after each firmware update.
You can use ethtool -i to verify whether the adapter has been flashed correctly.
# ethtool -i enp1s0f0
driver: be2net
version: 5.8.5
firmware-version: 12.0.1280.0
expansion-rom-version:
bus-info: 0000:01:00.0
supports-statistics: yes
supports-test: yes
supports-eeprom-access: yes
supports-register-dump: no
Connecting it all together
This should be everything to get the adapter up and running. However, the lights on the adapter didn’t turn on after connecting everything.
ethtool also shows that there’s no link detected:
# ethtool enp1s0f0
Settings for enp1s0f0:
        Supported ports: [ FIBRE ]
        Supported link modes:   1000baseT/Full
                                10000baseT/Full
        Supported pause frame use: Symmetric
        Supports auto-negotiation: No
        Supported FEC modes: Not reported
        Advertised link modes:  Not reported
        Advertised pause frame use: No
        Advertised auto-negotiation: No
        Advertised FEC modes: Not reported
        Speed: Unknown!
        Duplex: Unknown! (255)
        Port: FIBRE
        PHYAD: 1
        Transceiver: internal
        Auto-negotiation: off
        Supports Wake-on: d
        Wake-on: d
        Current message level: 0x00002000 (8192)
                        hw
        Link detected: no
This forum thread indicated that I had to reset the port in order to get it working. After installing the OneConnect Manager software (on a temporary CentOS installation) hbacmd ListHBAs didn’t list the adapter.
There was another post mentioning the brcmhbacmd command instead of hbacmd. I found a a compatible version of the Broadcom OneConnect Manager on the HP Enterprise support page as well:
brcmocm-rhel6-rhel7-rhel8-12.0.1269.0-1.tgz
(sha256: 4b2079d16c546e6e4f5e48facf808f6da7e175457682836a0aec46df3f1e1f50)
After issuing the brcmhbacmd SetPortEnabled commands to turn the port off and on again the link status finally changed to up:
# brcmhbacmd SetPortEnabled 00-00-00-00-00-01 0
# brcmhbacmd SetPortEnabled 00-00-00-00-00-01 1
be2net 0000:01:00.0 enp1s0f0: Link is Up
Some further research also showed that forcing the port to 10Gb speeds using the brcmhbacmd SetPhyPortSpeed command also enabled the ports.
ethtool now also shows the link is up and running:
# ethtool enp1s0f0
Settings for enp1s0f0:
        ...
        Speed: 10000Mb/s
        Duplex: Full
        ...
        Link detected: yes
For more information about the commands you can issue using the brcmhbacmd CLI Client see the Emulex® OneCommand® CNA Manager Command Line Interface User Guide.
A different solution
It was nice to finally get everything to work on CentOS (and Windows), but as I’m not using those operating systems on my NAS server and workstation I needed to find a different solution.
I turned to ethtool again, hoping it could force the port speed as well, but as it turns out, the be2net Linux driver doesn’t support those commands. In order to actually change these settings you need to use the proprietary OneConnect Manager software.
However, while reading the be2net kernel module source code I found that the self test, be_self_test, is supported in ethtool.
In the source code I saw some interesting references in that method relating to the link status, so I ran ethtool -t enp1s0f0 and — to my surprise — the lights on the adapter turned on and I was able to get an IP address.
The first time you use the self test command it actually returns a failure state, but after running it a second time it passes:
# ethtool -t enp1s0f0
The test result is PASS
The test extra info:
MAC Loopback test  0
PHY Loopback test  0
External Loopback test     0
DDR DMA test       0
Link test  0
This means I can enable the card on boot by running the self test. Not the ideal situation, but it works.
I also had to change the route metric to prioritize the 10GbE adapter. You can do this for dhcpcd by adding the following to /etc/dhcpcd.conf.
interface enp1s0f0
metric 1
interface enp1s0f1
metric 2
After restarting dhcpcd I was finally able to test the connection using iperf3:
$ iperf3 -c 192.168.1.123
Connecting to host 192.168.1.123, port 5201
[  5] local 192.168.1.234 port 39436 connected to 192.168.1.123 port 5201
[ ID] Interval           Transfer     Bitrate         Retr  Cwnd
[  5]   0.00-1.00   sec  1.09 GBytes  9.38 Gbits/sec    0   1.04 MBytes
[  5]   1.00-2.00   sec  1.09 GBytes  9.39 Gbits/sec    0   1.04 MBytes
[  5]   2.00-3.00   sec  1.09 GBytes  9.41 Gbits/sec    0   1.04 MBytes
[  5]   3.00-4.00   sec  1.09 GBytes  9.41 Gbits/sec    0   1.04 MBytes
[  5]   4.00-5.00   sec  1.09 GBytes  9.40 Gbits/sec    0   1.04 MBytes
[  5]   5.00-6.00   sec  1.09 GBytes  9.41 Gbits/sec    0   1.04 MBytes
[  5]   6.00-7.00   sec  1.09 GBytes  9.41 Gbits/sec    0   1.04 MBytes
[  5]   7.00-8.00   sec  1.09 GBytes  9.40 Gbits/sec    0   1.04 MBytes
[  5]   8.00-9.00   sec  1.09 GBytes  9.41 Gbits/sec    0   1.04 MBytes
[  5]   9.00-10.00  sec  1.09 GBytes  9.41 Gbits/sec    0   1.04 MBytes
- - - - - - - - - - - - - - - - - - - - - - - - -
[ ID] Interval           Transfer     Bitrate         Retr
[  5]   0.00-10.00  sec  10.9 GBytes  9.40 Gbits/sec    0             sender
[  5]   0.00-10.00  sec  10.9 GBytes  9.40 Gbits/sec                  receiver

iperf Done.
The iPerf ‘speed test’ shows that we now are able to reach a bitrate of 9.40 Gb/s. While is not a realistic figure for file transfers from my NAS, it shows the setup is working as expected. A quick data transfer test using SMB showed a 1.5x improvement in throughput.
I think this figure can still be improved since my NAS setup is far from perfect (It currently is using external USB drives because of the lack of 3.5" bays).
This will probably be the next thing I will upgrade. 😉
Conclusion
My experiment shows that it is possible to do a setup like this in an affordable way since there are a lot of second hand NICs on the market.
However, if I would do this again I would not go for Emulex OCe11000 series NICs. I would rather have a setup that works out of the box, with drivers that have better support for tools like ethtool (i.e. a NIC not using the be2net driver, but maybe an Intel based ixgbe adapter).